This version of a rustic cobbler is made with a homemade cherry filling topped by a sweet biscuit dough. Sprinkling sugar over the dough before baking gives the biscuits a “crunchy” top layer. Serve this cherry cobbler with whipped cream or a generous scoop of vanilla ice cream for a taste of summer.

Cobblers Aren’t Just One Thing
I grew up eating cherry cobbler with the pie crust topping. Later I encountered cobbler made by dropping fruit into a cake-like batter (it was also delicious). Then I became aware of a third style of cobbler made with a sweet biscuit dough top. Rachel Ray is how I learned about this other cobbler. I’d never heard of biscuits being sweet before, so that alone intrigued me to try the cobbler she made. Obviously I like the biscuit dough topping, since that’s the version I’m using in this recipe.
If you haven’t had a biscuit-topped cobbler before, give it a try — it may become a new favorite dessert.
The Filling Effort Level Is Up to You
This kind of cobbler is easy, no matter how you go about creating the fruit mixture. All the levels produce very tasty results. You decide what level of effort you want to go to.
Beyond Easy — canned pie filling
Super Easy — frozen fruit (just be sure to thaw completely and drain before using the fruit)
Still Very Easy — fresh fruit
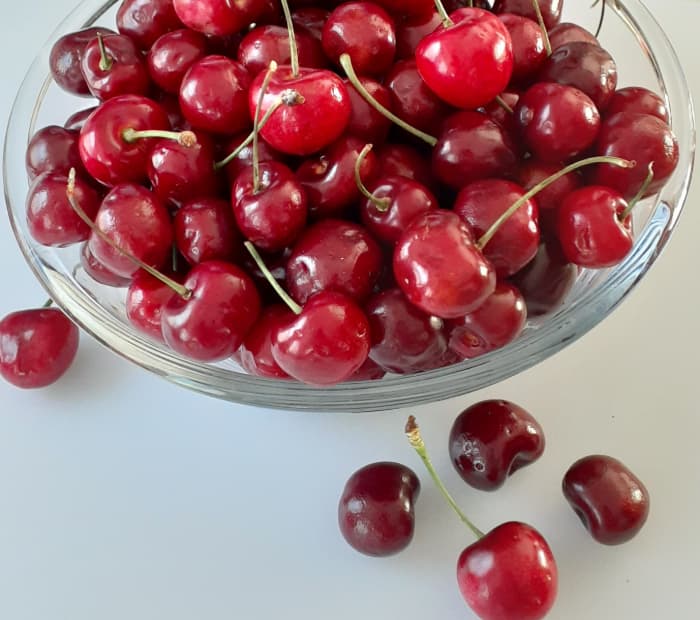
Fresh Cherries — What to Know

I chose to use fresh cherries in this recipe for a couple reasons.
The first is that, when I have the time, I really enjoy working with raw fruits and vegetables in my recipes. I find the activity of fruit or vegetable prep to be (mostly) relaxing.
The second is, years ago I made a blueberry “sauce” from a recipe I found in my Southern Living Cookbook (the 1987 edition). Once I saw how incredibly easy it was to make that blueberry sauce, I made a few tweaks, substituted other fruits for the blueberries, and I found all sorts of uses for these warm, syrupy, fruit concoctions. In this recipe I share my cherry version with you.
NOTE: If you decide you want to use frozen or canned cherries, just skip the step for pitting the cherries (you’ll save 20 minutes of time). If you choose to use canned cherry pie filling, you can skip all the steps for making the cherry cobbler filling (saving yourself another 20 minutes).
What Cherry to Use
There are over 1,000 varieties of cherries grown in the U.S. Just like other kinds of fruit, cherries are not one-size-fits-all and there are varieties that taste their best when cooked or baked. If I come across a cherry variety I’m unfamiliar with, I do a Google search to see if it’s one that’s recommended for baking.
Sour varieties (“pie cherries”) seem to be the agreed-upon standard for cherry baking recipes. They’re the cherries used in canned cherry pie filling. But if sour cherries are hard to come by (not all grocery stores carry them, I’ve discovered) there are plenty of articles that say it’s fine to select a sweet variety for baking if the amount of sugar in the recipe is reduced.
Another thing to know about fresh sour cherries is they have a very short season when you can find them in stores — usually lasting only a few weeks. As luck would have it, I wrote this piece outside of sour cherry season. And while I have used frozen cherries and also canned cherries in the past with great results, I couldn’t get it out of my head that I wanted to make this cobbler with a fresh cherry filling.
And that is how I arrived at my decision to use Bing cherries.
Dress for the Task of Cherry Pitting
You’d be surprised at how often I forget this and I appreciate it when I’m reminded about it by recipe authors. Pitting cherries always carries the risk of splatters and cherry juice stains can potentially ruin your favorite shirt. So do yourself (and your wardrobe) a favor and wear a shirt you don’t mind getting cherry juice on. Or wear black. Like a kitchen ninja.
Steps for the Cherry Cobbler
Rinse and pit the cherries.
I don’t own a cherry pitter and never have. Because my husband likes to borrow my kitchen tools when he can’t find his own things, I also no longer have a paring knife. But what I DO have are about two dozen steak knives (I don’t know why since it’s just the two of us) and steak knives actually work for pitting cherries.
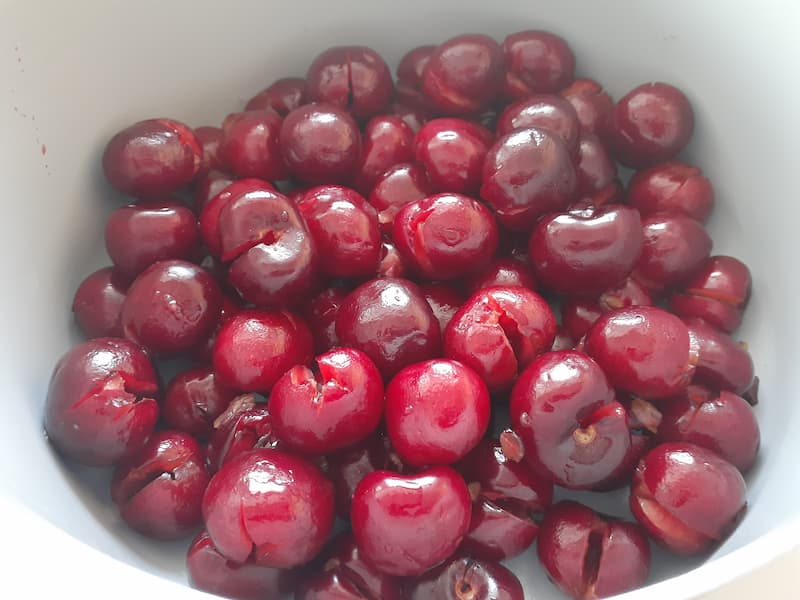
I cut each cherry open along one side and then use the point of the knife to loosen and remove the pit. I used to cut cherries into halves because it was easier to get to the pit, but I’ve decided for purely aesthetic reasons that I like to leave them whole-looking now. Once each cherry is pitted, I toss it into the saucepan I’ll be cooking them in.

Cherries are finally pitted. Give yourself a high-five for getting that done.

Add water and sugar to the cherries for the syrup.

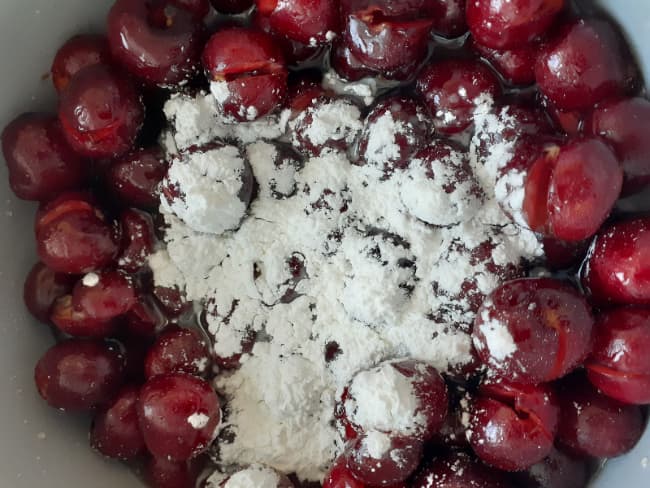
Add cornstarch for some thickening. I don’t want my cherry cobbler filling consistency to be too thick because I like to spoon some of the syrup over the topping as I’m eating it, so I only use a tablespoon for this recipe.

Cook until the cherries are soft and the syrup reaches a slightly thick consistency that thinly coats the spoon.

While the cherries are softening, prepare the dough for the cobbler topping. The liquid for the biscuit dough is buttermilk. I never seem to use buttermilk often enough to justify buying even the smallest cartons the grocery stores carry and I HATE wasting food. However, I discovered there is such a thing as powdered buttermilk and it’s been a pantry staple for me ever since.

Add all the ingredients and mix to form a wet dough that is almost batter consistency.

When the cherries are done, pour the mixture into a baking dish.

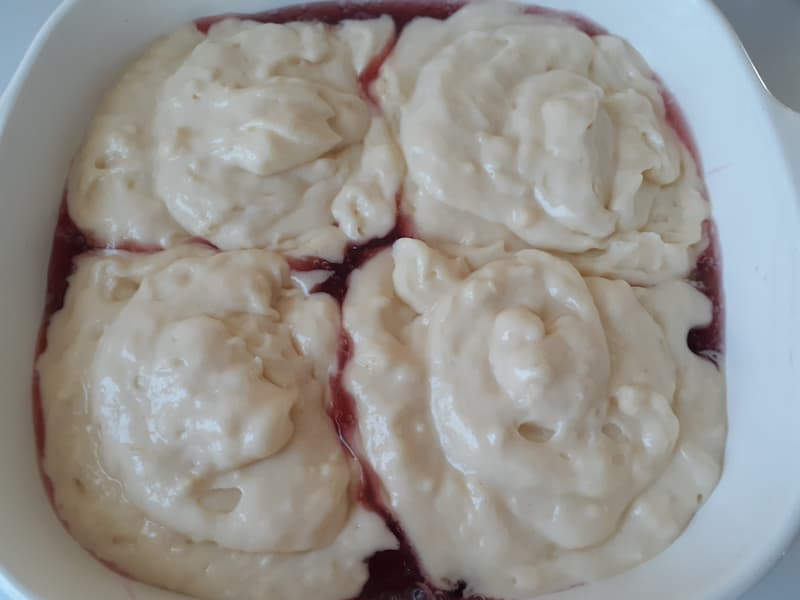
Top the cherries with large spoonfuls of the dough to form 4 sections. If there’s some dough leftover, that’s okay.

Sprinkle the dough with sugar, bake, and enjoy the heavenly aroma that comes from your oven.

So Many Fruits, So Many Possible Cobblers
I think it goes without saying that cobblers can be made with all sorts of fruits (peaches, pears, apples, nectarines, berries, and so on). They can be made with all one kind of fruit or with a combination of different fruits.
For me, part of what makes a cobbler so much fun to make is customizing it to suit me or whoever I’m enjoying it with. Experiment to create your own signature cobbler that everyone will look forward to you bringing to picnics or potlucks.
So now that I’ve (hopefully) intrigued you, let me share this easy, rustic-style cobbler. I think you’ll really enjoy it.
Excited for more cherry content? Then visit our cherry page for more planting tips, growing guides, recipe ideas, and more!
Still hungry for more? Then discover our other fruit recipes to stock up your kitchen with nature’s healthy and tasty goodies!

Rustic Cherry Cobbler
A rustic cobbler made with a homemade cherry filling topped by a sweet biscuit dough. Sprinkling sugar on the dough before baking creates a crunch on the top of the biscuits.
Ingredients
- 3-4 cups fresh cherries OR 3-4 cups frozen cherries OR 2 cans sour cherries
- ¼ cup granulated sugar (for filling)
- ½ cup water
- 1 tablespoon cornstarch
- Pinch of salt
- 1 heaping cup baking mix (like Bisquik)
- ½ cup buttermilk (OR 3 tablespoons powdered buttermilk and ½ cup water)
- ¼ cup granulated sugar (for biscuit dough)
- 4 tablespoons butter/margarine
Instructions
- Place the cherries in a colander and rinse them in cold water.
- Using a cherry pitter or a knife, pit the cherries.
- Combine the pitted cherries, water, sugar, cornstarch, and salt in a medium saucepan.
- Cook over low heat, stirring frequently, for 20 minutes or until the syrup reaches a consistency that thinly coats the spoon.
- While the cherries are softening, combine the baking mix, buttermilk (or powdered buttermilk and water), and butter to form a batter.
- Pour the cherry mixture into a 1 ½ quart baking dish.
- Top the cherries with large spoonfuls of the dough to form 4 sections.
- Sprinkle the top with sugar.
- Bake at 350 degrees for 30 minutes.
- Let stand for 15-20 minutes before serving.

- About the Author
- Latest Posts
Bree is a wife, mom to a silly pitbull, and a writer for Minneopa Orchards. She lives in Oregon where she works as a freelancer and spends her free time cooking or crafting.
She began gardening when she became a homeowner — whenever she moved into a new home, a garden was one of her first priorities. She enjoyed creating beautiful outdoor spaces in whatever growing zone she lived in and says her southwest gardens were the most challenging!
Bree currently lives in a downtown urban setting, so she’s making good use of indoor gardening methods. Writing for Minneopa Orchards also inspires her to experiment in the kitchen with fresh herbs and seasonal produce. Infused oils, fruit syrups, and dried fruits are some of her recent successes.

